从零开始制作deb包:让你的软件分发像喝水一样简单
昨天分享了rpm包制作,评论区有小伙伴问能否在ubantu使用的时候我才发现。是我疏忽了,只考虑rpm了。没考虑到deb安装包的制作!今天就把这个坑补上(又混一篇,嘻嘻!!!)

为什么要制作deb包
你可能会问,直接复制文件不是挺好的吗?为什么非要搞成deb包呢?
我之前也是这么想的,直到遇到了几个问题。比如说,我们的监控工具需要创建特定的用户、设置权限、配置systemd服务,还要处理配置文件的备份和恢复。如果用脚本来做这些事情,代码会变得很复杂,而且容易出错。
用deb包就不一样了,它有标准化的安装、卸载流程,可以处理依赖关系,还能跟系统的包管理器完美集成。用户只需要一个dpkg -i命令就能搞定所有事情,卸载的时候也很干净。
准备工作环境
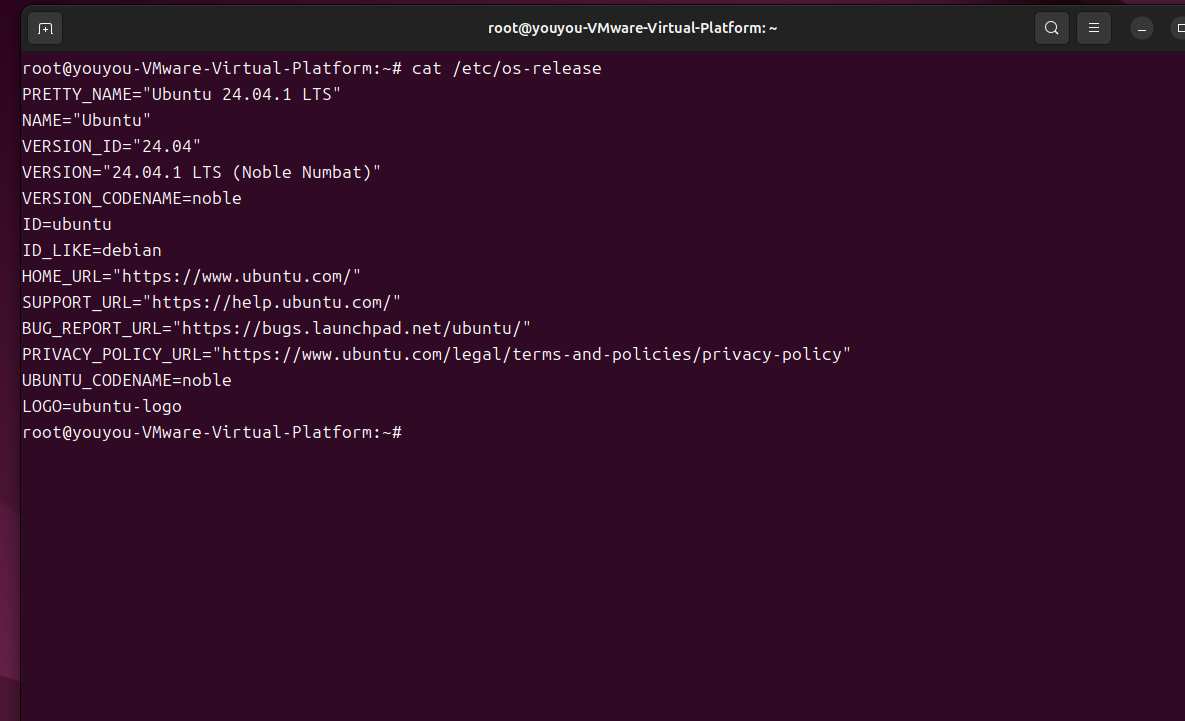
这次用的是ubantu 24.04.1 LTS

制作deb包需要安装一些工具:
sudo apt update
sudo apt install build-essential devscripts debhelper dh-make
这些工具的作用各不相同。build-essential提供了基本的编译环境,devscripts包含了一堆有用的脚本,debhelper是制作deb包的核心工具,dh-make可以快速生成包的模板。
创建包的基本结构
假设我们要打包一个叫做"mymonitor"的监控工具。整个工作目录的结构应该是这样的:
mymonitor-1.0/                    # 主工作目录
├── src/                          # 源码目录
│   └── mymonitor                 # 可执行文件
├── config/                       # 配置文件目录
│   └── mymonitor.conf           # 配置文件
├── systemd/                      # systemd服务文件目录
│   └── mymonitor.service        # 服务文件
└── debian/                       # deb包制作目录
    ├── control                   # 包信息文件
    ├── rules                     # 构建规则文件
    ├── changelog                 # 变更日志
    ├── copyright                 # 版权信息
    ├── compat                    # 兼容性版本
    ├── postinst                  # 安装后脚本
    ├── prerm                     # 卸载前脚本
    └── postrm                    # 卸载后脚本
创建这个结构的步骤是:
# 1. 创建主工作目录
mkdir mymonitor-1.0
cd mymonitor-1.0

# 2. 创建源码相关目录
mkdir -p src config systemd

# 3. 创建debian目录
mkdir debian这里有个重要概念要理解:源码目录和安装目标目录是不同的。
src/、config/、systemd/这些是源码目录,存放你要打包的原始文件- 而在rules文件中,
debian/mymonitor/usr/bin/这些是安装目标目录,是deb包安装时文件的最终位置
我来举个具体例子说明这个映射关系:
# 源码文件位置 → 安装后的系统位置
src/mymonitor → /usr/bin/mymonitor
config/mymonitor.conf → /etc/mymonitor/mymonitor.conf
systemd/mymonitor.service → /lib/systemd/system/mymonitor.service
在rules文件中,我们通过cp命令建立这种映射:
override_dh_auto_install:
    # 先创建目标目录结构
    mkdir -p debian/mymonitor/usr/bin
    mkdir -p debian/mymonitor/etc/mymonitor
    mkdir -p debian/mymonitor/lib/systemd/system

    # 然后复制文件到目标位置
    cp src/mymonitor debian/mymonitor/usr/bin/
    cp config/mymonitor.conf debian/mymonitor/etc/mymonitor/
cp systemd/mymonitor.service debian/mymonitor/lib/systemd/system/这里的debian/mymonitor/是一个临时目录,dpkg-buildpackage会把这个目录的内容打包成deb文件。安装deb包时,debian/mymonitor/usr/bin/mymonitor就会被复制到系统的/usr/bin/mymonitor。
我刚开始的时候也搞不清楚,总是把文件放错位置。后来发现一个简单的理解方法:
- 工作目录:你当前编辑文件的地方
- 源码目录:存放原始文件的地方(src、config等)
- 构建目录:debian/包名/ 下面的目录结构,这个要和最终安装位置一致
- 安装目录:用户系统上的最终位置(/usr/bin、/etc等)
再看一个更复杂的例子,比如我们的监控工具需要这些文件:
# 创建完整的源码目录结构
mkdir -p src/bin src/lib
mkdir -p config/default config/examples
mkdir -p docs/man systemd init.d
mkdir -p web/static web/templates

# 放入对应的文件
echo '#!/usr/bin/env python3' > src/bin/mymonitor
echo 'import sys' > src/lib/monitor_lib.py
echo '[monitor]' > config/default/mymonitor.conf
echo 'interval=10' >> config/default/mymonitor.conf
对应的rules文件就要这样写:
override_dh_auto_install:
    # 创建所有需要的目标目录
    mkdir -p debian/mymonitor/usr/bin
    mkdir -p debian/mymonitor/usr/lib/mymonitor
    mkdir -p debian/mymonitor/etc/mymonitor
    mkdir -p debian/mymonitor/etc/mymonitor/examples
    mkdir -p debian/mymonitor/usr/share/man/man1
    mkdir -p debian/mymonitor/lib/systemd/system
    mkdir -p debian/mymonitor/usr/share/mymonitor/web/static
    mkdir -p debian/mymonitor/usr/share/mymonitor/web/templates

    # 复制可执行文件
    cp src/bin/mymonitor debian/mymonitor/usr/bin/
    chmod +x debian/mymonitor/usr/bin/mymonitor

    # 复制库文件
    cp src/lib/*.py debian/mymonitor/usr/lib/mymonitor/

    # 复制配置文件
    cp config/default/mymonitor.conf debian/mymonitor/etc/mymonitor/
    cp config/examples/* debian/mymonitor/etc/mymonitor/examples/

    # 复制文档
    cp docs/man/mymonitor.1 debian/mymonitor/usr/share/man/man1/

    # 复制服务文件
    cp systemd/mymonitor.service debian/mymonitor/lib/systemd/system/

    # 复制web文件
    cp -r web/static/* debian/mymonitor/usr/share/mymonitor/web/static/
    cp -r web/templates/* debian/mymonitor/usr/share/mymonitor/web/templates/
构建完成后,你可以用这个命令检查包的内容:
dpkg -c ../mymonitor_1.0-1_amd64.deb输出会显示包里所有文件的路径,这样你就能确认文件是否放在了正确的位置。
还有一个调试技巧,构建过程中可以查看临时目录:
# 构建过程中,可以查看这个目录的内容
ls -la debian/mymonitor/
tree debian/mymonitor/
这个临时目录的结构就是最终安装到系统中的结构,非常直观。
我记得刚开始做包的时候,经常出现文件找不到或者权限不对的问题,基本都是因为目录结构搞错了。多练习几次,理解了这个映射关系就好了。
control文件
这个文件定义了包的基本信息:
Source: mymonitor
Section: utils
Priority: optional
Maintainer: Your Name <your.email@example.com>
Build-Depends: debhelper (>= 10)
Standards-Version: 4.1.2

Package: mymonitor
Architecture: amd64
Depends: python3, systemd
Description: A simple monitoring tool
 This is a monitoring tool for system resources.
 It provides real-time monitoring capabilities
 and can send alerts when thresholds are exceeded.
这里有个坑,Description字段的格式比较特殊。第一行是简短描述,后面的详细描述每行都要以空格开头。我第一次做的时候就是因为格式不对,构建一直失败。
rules文件
这个文件定义了如何构建和安装包:
#!/usr/bin/make -f

%:
    dh $@

override_dh_auto_install:
    mkdir -p debian/mymonitor/usr/bin
    mkdir -p debian/mymonitor/etc/mymonitor
    mkdir -p debian/mymonitor/var/log/mymonitor
    mkdir -p debian/mymonitor/lib/systemd/system

    cp src/mymonitor debian/mymonitor/usr/bin/
    cp config/mymonitor.conf debian/mymonitor/etc/mymonitor/
    cp systemd/mymonitor.service debian/mymonitor/lib/systemd/system/

    chmod +x debian/mymonitor/usr/bin/mymonitor
记得给rules文件加上执行权限:
chmod +x debian/ruleschangelog文件
这个文件记录版本变更历史,格式很严格:
mymonitor (1.0-1) unstable; urgency=medium

  * Initial release
  * Added basic monitoring functionality
  * Added systemd service support

 -- Your Name <your.email@example.com>  Mon, 15 Jan 2024 10:00:00 +0800
时间格式必须严格按照RFC 2822标准,不然会报错。我建议用date -R命令生成正确的时间格式。
copyright文件
版权信息文件:
Format: https://www.debian.org/doc/packaging-manuals/copyright-format/1.0/
Upstream-Name: mymonitor
Source: https://github.com/yourname/mymonitor

Files: *
Copyright: 2024 Your Name <your.email@example.com>
License: MIT

License: MIT
 Permission is hereby granted, free of charge, to any person obtaining a
 copy of this software and associated documentation files (the "Software"),
 to deal in the Software without restriction...
compat文件
这个文件只需要一个数字,表示debhelper的兼容级别:
10处理安装前后的脚本
deb包的一个强大功能就是可以在安装前后执行自定义脚本。我们可以创建以下几个文件:
postinst文件(安装后执行)
#!/bin/bash
set -e

# 创建用户
if ! id "mymonitor" &>/dev/null; then
    useradd -r -s /bin/false mymonitor
fi

# 设置权限
chown mymonitor:mymonitor /var/log/mymonitor
chmod 755 /var/log/mymonitor

# 启用并启动服务
systemctl daemon-reload
systemctl enable mymonitor
systemctl start mymonitor

exit 0
prerm文件(卸载前执行)
#!/bin/bash
set -e

# 停止服务
if systemctl is-active --quiet mymonitor; then
    systemctl stop mymonitor
fi

if systemctl is-enabled --quiet mymonitor; then
    systemctl disable mymonitor
fi

exit 0
postrm文件(卸载后执行)
#!/bin/bash
set -e

case "$1" in
    purge)
        # 完全删除时清理用户和数据
        if id "mymonitor" &>/dev/null; then
            userdel mymonitor
        fi

        rm -rf /var/log/mymonitor
        ;;
    remove)
        # 只是删除包,保留配置
        ;;
esac

systemctl daemon-reload

exit 0
记得给这些脚本加上执行权限:
chmod +x debian/postinst debian/prerm debian/postrm准备要打包的文件
在项目根目录下创建对应的目录结构,放入要打包的文件:
mkdir -p src config systemd比如我们的监控脚本:
# src/mymonitor
#!/usr/bin/env python3
import time
import psutil
import json

def main():
    while True:
        cpu_percent = psutil.cpu_percent(interval=1)
        memory = psutil.virtual_memory()

        data = {
            'cpu': cpu_percent,
            'memory': memory.percent,
            'timestamp': time.time()
        }

        print(json.dumps(data))
        time.sleep(10)

if __name__ == '__main__':
    main()
配置文件:
# config/mymonitor.conf
[monitor]
interval = 10
cpu_threshold = 80
memory_threshold = 85

[logging]
level = INFO
file = /var/log/mymonitor/mymonitor.log
systemd服务文件:
# systemd/mymonitor.service
[Unit]
Description=MyMonitor Service
After=network.target

[Service]
Type=simple
User=mymonitor
ExecStart=/usr/bin/mymonitor
Restart=always
RestartSec=10

[Install]
WantedBy=multi-user.target
构建deb包
现在所有文件都准备好了,可以开始构建了:
dpkg-buildpackage -us -uc -b参数说明:
-us: 不签名源码包-uc: 不签名变更文件-b: 只构建二进制包
如果一切顺利,你会在上级目录看到生成的deb文件:
ls ../mymonitor_1.0-1_amd64.deb构建过程中可能会遇到各种错误。比较常见的有:
- 文件权限问题:确保所有脚本都有执行权限
- 格式错误:特别是changelog和control文件的格式
- 依赖问题:检查Build-Depends是否正确
我记得第一次构建的时候,光是格式错误就折腾了半天。debian的包格式要求真的很严格,一个空格都不能错。
测试安装包
构建成功后,先在测试环境验证一下:
sudo dpkg -i ../mymonitor_1.0-1_amd64.deb检查安装是否正确:
# 检查文件是否正确安装
ls -la /usr/bin/mymonitor
ls -la /etc/mymonitor/
ls -la /var/log/mymonitor/

# 检查服务状态
systemctl status mymonitor

# 检查用户是否创建
id mymonitor
测试卸载:
sudo dpkg -r mymonitor如果要完全清理(包括配置文件):
sudo dpkg -P mymonitor一些实用技巧
在实际制作过程中,我总结了一些小技巧:
使用dh_make快速生成模板
如果你觉得手动创建这些文件太麻烦,可以用dh_make生成模板:
dh_make -e your.email@example.com -f ../mymonitor-1.0.tar.gz不过生成的模板文件比较复杂,需要大量修改。我个人还是喜欢手动创建,更清楚每个文件的作用。
处理配置文件
如果你的包包含配置文件,可以在debian目录下创建conffiles文件:
/etc/mymonitor/mymonitor.conf这样dpkg就知道这是配置文件,升级时会妥善处理。
添加依赖检查
在postinst脚本中可以添加一些依赖检查:
# 检查Python3是否安装
if ! command -v python3 &> /dev/null; then
    echo "Error: Python3 is required but not installed"
    exit 1
fi

# 检查psutil模块
if ! python3 -c "import psutil" &> /dev/null; then
    echo "Installing psutil..."
    pip3 install psutil
fi
处理多架构
如果你的软件需要支持多种架构,可以在control文件中设置:
Architecture: any或者指定具体架构:
Architecture: amd64 arm64高级功能
添加预依赖和冲突
有时候你的包可能与其他包冲突,或者需要在某个包之前安装:
Pre-Depends: some-package
Conflicts: conflicting-package
Replaces: old-package
使用triggers
如果你的包需要在其他包安装后执行某些操作,可以使用triggers机制。创建debian/triggers文件:
interest /usr/share/applications然后在postinst中处理trigger:
case "$1" in
    triggered)
        # 处理trigger事件
        update-desktop-database
        ;;
esac
分包
对于复杂的软件,可能需要分成多个包。比如主程序包、开发包、文档包等。在control文件中定义多个Package段即可。
调试技巧
制作deb包的过程中难免会遇到问题,这里分享几个调试方法:
查看包内容
dpkg -c mymonitor_1.0-1_amd64.deb查看包信息
dpkg -I mymonitor_1.0-1_amd64.deb模拟安装
dpkg --simulate -i mymonitor_1.0-1_amd64.deb检查包质量
lintian mymonitor_1.0-1_amd64.deblintian会检查包是否符合Debian政策,虽然有些警告可以忽略,但错误一定要修复。
自动化构建
如果你需要经常构建包,可以写个简单的脚本:
#!/bin/bash

VERSION=${1:-1.0}
PACKAGE_NAME="mymonitor"

# 清理旧文件
rm -f ../${PACKAGE_NAME}_*.deb
rm -f ../${PACKAGE_NAME}_*.changes
rm -f ../${PACKAGE_NAME}_*.buildinfo

# 更新版本号
sed -i "1s/.*/${PACKAGE_NAME} (${VERSION}-1) unstable; urgency=medium/" debian/changelog

# 构建包
dpkg-buildpackage -us -uc -b

if [ $? -eq 0 ]; then
    echo "Package built successfully: ../${PACKAGE_NAME}_${VERSION}-1_amd64.deb"
else
    echo "Build failed!"
    exit 1
fi
实战案例:将nginx打包成deb包
现在我们来把自定义编译的nginx打包成deb包。因为我们需要添加一些第三方模块,官方的nginx包不能满足需求。这个过程比较复杂,但很有代表性,我详细说一下。
首先准备nginx源码和需要的模块:
wget http://nginx.org/download/nginx-1.20.2.tar.gz
tar -xzf nginx-1.20.2.tar.gz
cd nginx-1.20.2
创建debian目录结构:
mkdir debiannginx的control文件比较复杂,因为依赖比较多:
cat <<EOF >control
Source: nginx-custom
Section: httpd
Priority: optional
Maintainer: Your Name <your.email@example.com>
Build-Depends: debhelper (>= 10), libssl-dev, libpcre3-dev, zlib1g-dev, libgeoip-dev
Standards-Version: 4.1.2

Package: nginx-custom
Architecture: amd64
Depends: ${shlibs:Depends}, ${misc:Depends}, adduser, lsb-base
Provides: httpd, nginx
Conflicts: nginx, nginx-full, nginx-light
Description: High performance web server (custom build)
 Nginx is a web server with a strong focus on high concurrency, performance
 and low memory usage. This is a custom build with additional modules.
EOF这里要注意几个点。${shlibs:Depends}会自动检测动态库依赖,Conflicts字段防止与系统自带的nginx冲突。
rules文件需要处理编译过程:
#!/usr/bin/make -f

export DEB_BUILD_MAINT_OPTIONS = hardening=+all
export DEB_CFLAGS_MAINT_APPEND = -Wp,-D_FORTIFY_SOURCE=2 -fPIC

%:
    dh $@

override_dh_auto_configure:
    ./configure \
        --prefix=/etc/nginx \
        --sbin-path=/usr/sbin/nginx \
        --modules-path=/usr/lib/nginx/modules \
        --conf-path=/etc/nginx/nginx.conf \
        --error-log-path=/var/log/nginx/error.log \
        --http-log-path=/var/log/nginx/access.log \
        --pid-path=/var/run/nginx.pid \
        --lock-path=/var/run/nginx.lock \
        --http-client-body-temp-path=/var/cache/nginx/client_temp \
        --http-proxy-temp-path=/var/cache/nginx/proxy_temp \
        --http-fastcgi-temp-path=/var/cache/nginx/fastcgi_temp \
        --http-uwsgi-temp-path=/var/cache/nginx/uwsgi_temp \
        --http-scgi-temp-path=/var/cache/nginx/scgi_temp \
        --user=nginx \
        --group=nginx \
        --with-http_ssl_module \
        --with-http_realip_module \
        --with-http_addition_module \
        --with-http_sub_module \
        --with-http_dav_module \
        --with-http_flv_module \
        --with-http_mp4_module \
        --with-http_gunzip_module \
        --with-http_gzip_static_module \
        --with-http_random_index_module \
        --with-http_secure_link_module \
        --with-http_stub_status_module \
        --with-http_auth_request_module \
        --with-http_xslt_module=dynamic \
        --with-http_image_filter_module=dynamic \
        --with-http_geoip_module=dynamic \
        --with-threads \
        --with-stream \
        --with-stream_ssl_module \
        --with-stream_ssl_preread_module \
        --with-stream_realip_module \
        --with-stream_geoip_module=dynamic \
        --with-http_slice_module \
        --with-file-aio \
        --with-http_v2_module

override_dh_auto_install:
    $(MAKE) DESTDIR=$(CURDIR)/debian/nginx-custom install

    # 创建必要的目录
    mkdir -p debian/nginx-custom/var/cache/nginx
    mkdir -p debian/nginx-custom/var/log/nginx
    mkdir -p debian/nginx-custom/etc/nginx/conf.d
    mkdir -p debian/nginx-custom/etc/nginx/sites-available
    mkdir -p debian/nginx-custom/etc/nginx/sites-enabled
    mkdir -p debian/nginx-custom/usr/share/nginx/html
    mkdir -p debian/nginx-custom/lib/systemd/system

    # 复制配置文件
    cp debian/nginx.conf debian/nginx-custom/etc/nginx/
    cp debian/default.conf debian/nginx-custom/etc/nginx/conf.d/
    cp debian/nginx.service debian/nginx-custom/lib/systemd/system/

    # 复制默认页面
    cp debian/index.html debian/nginx-custom/usr/share/nginx/html/
    cp debian/50x.html debian/nginx-custom/usr/share/nginx/html/

override_dh_auto_clean:
    dh_auto_clean
    rm -f objs/Makefile
nginx的postinst脚本比较复杂,需要创建用户、设置权限、处理服务:
cat <<eoof >postinst
#!/bin/bash
set -e

case "$1" in
    configure)
        # 创建nginx用户
        if ! getent group nginx >/dev/null; then
            addgroup --system nginx
        fi

        if ! getent passwd nginx >/dev/null; then
            adduser --system --disabled-login --ingroup nginx \
                --no-create-home --home /nonexistent \
                --gecos "nginx user" --shell /bin/false nginx
        fi

        # 设置目录权限
        chown -R nginx:adm /var/log/nginx
        chmod 755 /var/log/nginx

        chown -R nginx:nginx /var/cache/nginx
        chmod 700 /var/cache/nginx

        # 创建默认站点软链接
        if [ ! -e /etc/nginx/sites-enabled/default ] && [ -e /etc/nginx/sites-available/default ]; then
            ln -s /etc/nginx/sites-available/default /etc/nginx/sites-enabled/default
        fi

        # 测试配置文件
        if nginx -t 2>/dev/null; then
            systemctl daemon-reload

            if systemctl is-enabled nginx.service >/dev/null 2>&1; then
                systemctl reload nginx.service || systemctl restart nginx.service
            else
                systemctl enable nginx.service
                systemctl start nginx.service
            fi
        else
            echo "Nginx configuration test failed. Please check your configuration."
            echo "Run 'nginx -t' for more details."
        fi
        ;;
esac

exit 0
eoof
prerm脚本处理服务停止:
cat <<eoof >prerm
#!/bin/bash
set -e

case "$1" in
    remove|upgrade|deconfigure)
        if [ -x /usr/sbin/nginx ]; then
            if systemctl is-active nginx.service >/dev/null 2>&1; then
                systemctl stop nginx.service
            fi
        fi
        ;;
esac

exit 0
eoof
还需要准备一些配置文件模板。nginx.conf:
cat <<eoof >nginx.conf
user nginx;
worker_processes auto;
pid /run/nginx.pid;

events {
    worker_connections 1024;
}

http {
    log_format main '$remote_addr - $remote_user [$time_local] "$request" '
                    '$status $body_bytes_sent "$http_referer" '
                    '"$http_user_agent" "$http_x_forwarded_for"';

    access_log /var/log/nginx/access.log main;
    error_log /var/log/nginx/error.log;

    sendfile on;
    tcp_nopush on;
    tcp_nodelay on;
    keepalive_timeout 65;
    types_hash_max_size 2048;

    include /etc/nginx/mime.types;
    default_type application/octet-stream;

    include /etc/nginx/conf.d/*.conf;
    include /etc/nginx/sites-enabled/*;
}
eoof
systemd服务文件nginx.service:
cat <<eoof >nginx.service
[Unit]
Description=A high performance web server and a reverse proxy server
Documentation=man:nginx(8)
After=network.target nss-lookup.target

[Service]
Type=forking
PIDFile=/run/nginx.pid
ExecStartPre=/usr/sbin/nginx -t -q -g 'daemon on; master_process on;'
ExecStart=/usr/sbin/nginx -g 'daemon on; master_process on;'
ExecReload=/bin/kill -s HUP $MAINPID
KillMode=mixed
KillSignal=SIGTERM
PrivateDevices=yes
LimitNOFILE=65536

[Install]
WantedBy=multi-user.target
eoof
# changelog
cat > debian/changelog << EOF
nginx-custom (1.20.2-1) unstable; urgency=medium
* Custom nginx build with additional modules
-- $(whoami) <$(whoami)@$(hostname)> $(date -R)
EOF
# copyright
echo "Custom nginx build" > debian/copyright
# compat
echo "10" > debian/compat
EOF
#开始构建
dpkg-buildpackage -us -uc -b
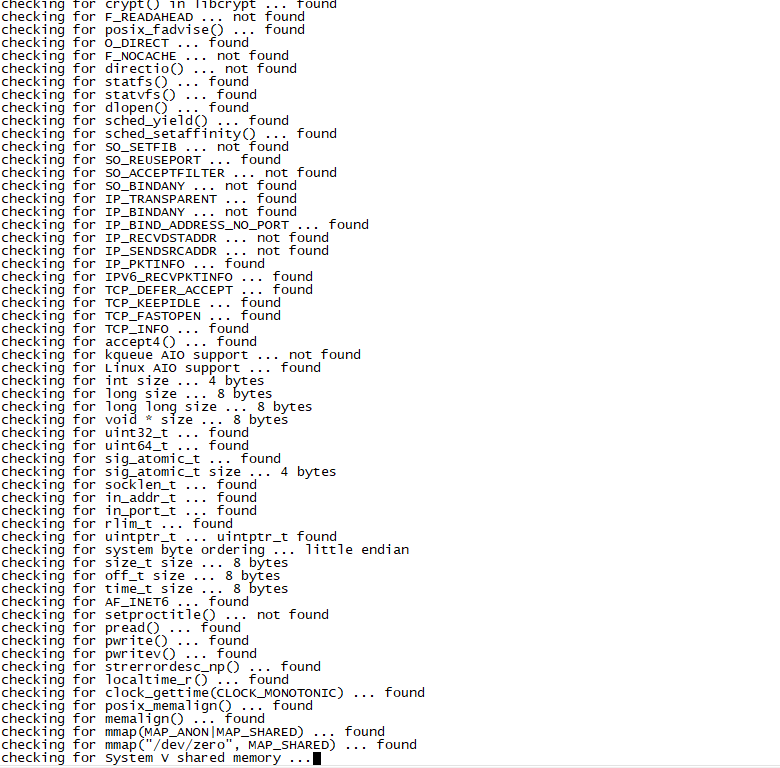
构建中...

构建完成

构建nginx包的时候经常会遇到依赖问题,特别是一些开发库。我建议先在干净的Docker环境中测试构建过程:
FROM ubuntu:20.04
RUN apt update && apt install -y build-essential devscripts debhelper \
    libssl-dev libpcre3-dev zlib1g-dev libgeoip-dev libxslt1-dev libgd-dev
COPY . /src
WORKDIR /src
RUN dpkg-buildpackage -us -uc -b
nginx包构建成功后,测试安装:
sudo dpkg -i nginx-custom_1.20.2-1_amd64.deb
sudo systemctl status nginx
curl http://localhost
这个nginx打包的例子比较复杂,但涵盖了很多实际场景中会遇到的问题:编译配置、用户管理、服务处理、配置文件管理等。掌握了这个例子,基本上大部分软件的打包都能搞定了。
发布和分发布和分发
包构建好了,接下来就是分发的问题。有几种常见的方式:
直接分发deb文件
最简单的方式就是直接把deb文件放到文件服务器上,用户下载后手动安装。不过这种方式有个问题,就是更新比较麻烦,用户需要手动检查新版本。
搭建APT仓库
如果你有多个包需要维护,或者需要频繁更新,建议搭建自己的APT仓库。我之前用过几种方案:
最简单的是用reprepro工具:
sudo apt install reprepro创建仓库配置:
mkdir -p /var/www/apt/conf
cat > /var/www/apt/conf/distributions << EOF
Origin: MyCompany
Label: MyCompany Repository
Codename: focal
Architectures: amd64 arm64
Components: main
Description: Internal software repository
EOF
添加包到仓库:
cd /var/www/apt
reprepro includedeb focal /path/to/mymonitor_1.0-1_amd64.deb
然后配置nginx或apache提供HTTP访问。用户只需要添加你的仓库源就能用apt安装了:
echo "deb http://your-server/apt focal main" | sudo tee /etc/apt/sources.list.d/mycompany.list
sudo apt update
sudo apt install mymonitor
使用GitHub Releases
如果你的项目托管在GitHub上,可以利用GitHub Actions自动构建和发布:
name: Build DEB Package

on:
  push:
    tags:
      - 'v*'

jobs:
  build:
    runs-on: ubuntu-latest

    steps:
    - uses: actions/checkout@v2

    - name: Install build dependencies
      run: |
        sudo apt update
        sudo apt install build-essential devscripts debhelper

    - name: Build package
      run: |
        dpkg-buildpackage -us -uc -b

    - name: Create Release
      uses: actions/create-release@v1
      env:
        GITHUB_TOKEN: ${{ secrets.GITHUB_TOKEN }}
      with:
        tag_name: ${{ github.ref }}
        release_name: Release ${{ github.ref }}
        draft: false
        prerelease: false

    - name: Upload DEB file
      uses: actions/upload-release-asset@v1
      env:
        GITHUB_TOKEN: ${{ secrets.GITHUB_TOKEN }}
      with:
        upload_url: ${{ steps.create_release.outputs.upload_url }}
        asset_path: ../mymonitor_*.deb
        asset_name: mymonitor.deb
        asset_content_type: application/vnd.debian.binary-package
版本管理策略
随着软件的迭代,版本管理变得很重要。Debian包的版本号格式是upstream-version-debian-revision。
比如1.2.3-1表示上游版本是1.2.3,Debian打包版本是1。如果只是修改了打包脚本而软件本身没变,可以发布1.2.3-2。
我一般的做法是:
- 软件功能更新:增加upstream版本号
- 修复打包问题:增加debian版本号
- 重大更新:直接跳到下一个大版本
更新changelog的时候要注意格式:
mymonitor (1.1-1) unstable; urgency=medium

  * Added email notification feature
  * Fixed memory leak in monitoring loop
  * Updated systemd service configuration

 -- Your Name <your.email@example.com>  Wed, 20 Jan 2024 14:30:00 +0800

mymonitor (1.0-2) unstable; urgency=low

  * Fixed postinst script permissions issue
  * Updated package description

 -- Your Name <your.email@example.com>  Tue, 16 Jan 2024 09:15:00 +0800
常见问题和解决方案
在制作deb包的过程中,我遇到过不少坑,这里总结一些常见问题:
文件权限问题
有时候安装后文件权限不对,特别是可执行文件。除了在rules文件中设置chmod,还可以在postinst中再次确认:
chmod +x /usr/bin/mymonitor
chown root:root /usr/bin/mymonitor
服务启动失败
systemd服务配置有问题是常见情况。记得在postinst中加上错误处理:
systemctl daemon-reload
if ! systemctl enable mymonitor; then
    echo "Warning: Failed to enable mymonitor service"
fi

if ! systemctl start mymonitor; then
    echo "Warning: Failed to start mymonitor service"
    echo "Check 'systemctl status mymonitor' for details"
fi
依赖地狱
有时候你的软件依赖的包在目标系统上版本不对。可以在control文件中指定版本范围:
Depends: python3 (>= 3.6), python3-psutil (>= 5.0)配置文件冲突
如果用户修改了配置文件,升级时可能会有冲突。dpkg会询问用户如何处理,但你也可以在脚本中智能处理:
# 在postinst中备份用户配置
if [ -f /etc/mymonitor/mymonitor.conf ]; then
    cp /etc/mymonitor/mymonitor.conf /etc/mymonitor/mymonitor.conf.backup
fi
多环境适配
如果你的软件需要在不同的Ubuntu版本上运行,可能需要做一些适配:
条件依赖
Depends: python3 (>= 3.6) | python3.6, systemd | upstart版本检测
在脚本中检测系统版本:
if [ -f /etc/os-release ]; then
    . /etc/os-release
    if [ "$VERSION_ID" = "18.04" ]; then
        # Ubuntu 18.04 特殊处理
        echo "Detected Ubuntu 18.04"
    fi
fi
说实话,多版本适配是个很头疼的问题。我的建议是尽量保持简单,只支持主流的LTS版本。
最后!!!
制作deb包看起来复杂,但掌握了基本套路后其实不难。关键是要理解每个文件的作用,特别是control、rules和各种脚本文件。
我觉得最重要的几点是:
- 格式要严格按照标准,特别是changelog和control文件
- 安装卸载脚本要处理好各种异常情况
- 文件权限和用户权限要设置正确
- 多测试,特别是在干净的环境中测试
虽然现在容器化部署很流行,但deb包在某些场景下还是很有用的,特别是系统级的工具和服务。而且掌握了deb包制作,对理解Linux系统的包管理机制也很有帮助。
最后提醒一下,制作包是个细致活,第一次做肯定会遇到各种问题,不要着急,多看日志,多查文档。Debian的官方文档虽然比较枯燥,但很全面,遇到问题时是最好的参考。
如果这篇文章对你有帮助,别忘了点赞转发支持一下!想了解更多运维实战经验和技术干货,记得关注微信公众号@运维躬行录,领取学习大礼包!!!我会持续分享更多接地气的运维知识和踩坑经验。让我们一起在运维这条路上互相学习,共同进步!
公众号:运维躬行录
个人博客:躬行笔记

